I’m blogging after aeons! Been really busy; work is such :-/ It’s not like I haven’t been tinkering at all, it’s just that I’ve been tinkering less, and haven’t had the time to document it.
A few weeks ago I decided that I needed a Bluetooth-to-audio adapter for my home (which has a decent but dated Sony home theatre) and car (which has an old stereo system). So this vacation I decided to make one.
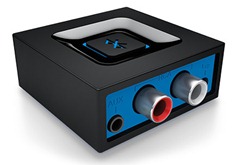
Logitech’s Bluetooth Speaker Adapter has got a 3.5mm socket as well as RCA outputs
I was looking for an end result similar to Logitech’s Bluetooth Speaker Adapter, available on Amazon for INR1,100 (~USD16) as on Sep, ‘15. There are predominantly two types of Bluetooth audio adapters available online – one, which outputs analog audio through a 3.5mm jack, and connects to your sound system’s AUX/RCA input. The second, slightly more interesting version (to my mind, at least), plugs in to the USB port of more modern mp3-capable sound systems. The adapter ‘appears’ as a regular USB flash drive with an MP3 file on it. The audio streamed over bluetooth is constantly written and buffered to the ‘mp3 file’. Pretty ingenious!
As with most of my projects, I turned to the internet to do a little pre-hacking research. I took a look at a few DIY hacks – google “hack car stereo bluetooth”, and you’ll get links to several people who’ve given new life to the old cassette deck in their dad’s rickety jalopy.
Pretty straightforward: http://www.instructables.com/id/Add-bluetooth-to-your-car-stereo/?ALLSTEPS
A bluetooth speaker modified to do the business: http://www.instructables.com/id/Bluetooth-Speaker-Hack-Home-Theater-Streaming/?ALLSTEPS
And for those people still rocking cassette tapes in 2015 (my mom, for example), this guy made a ‘bluetooth cassette’: http://car-mods.wonderhowto.com/how-to/hack-your-cars-cassette-deck-into-wireless-bluetooth-music-player-0139843/
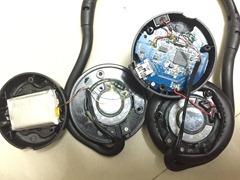
I was initially thinking of modifying the BT earpiece I use with my phone, however that would limit me to a mono output only (there are earpieces which have stereo outputs, so these too, may be good contenders for a hack). I had an old Corseca/Byte brand on-ear headphones lying around. The ear pads were crumbling, and the sound quality was absolute rubbish. But it was still working, and I was pretty certain that the poor audio was only due to the low cost sound drivers. So naturally, I took a screwdriver to the headphones, hehe.

Not sure if the brand is ‘Corseca’ or ‘Byte’
Disassembly was rather painless – just a few screws and plastic retention clips. The electronics were crammed into the plastic cover over one ear, and the battery was stuck with double sided tape in the other cover. The cover which had the electronics also had control buttons on the other side – FF, REW, Vol Up, Vol Down, Call Answer.
No surprises about the main chip being from CSR (now acquired by Qualcomm). CSR is a major in BT consumer electronics ICs, and you’d find CSR chips in everything from keyboards, to headsets, to smart microwaves. The main chip is a CSR57F68 A2DP streaming audio chip. The chip is fully integrated, and has two onboard differential audio outputs, button handling capabilities (debounce, etc), GPIOs, and of course, the BT radio itself.
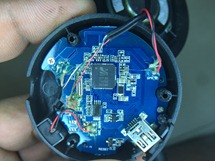
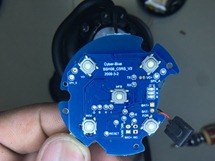
The electronics were on a double-sided board – one side with the chips and support circuitry (Left), and the other side with buttons and status LEDs (Right)
The TSSOP chip is an L24C32, 32kbit I2C EEPROM, which probably stores config data, descriptor strings, etc.
I then desoldered the sound driver and battery wires.
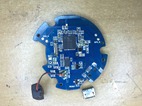
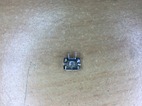
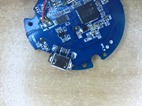
Desoldering the mini-USB charging socket, and replaced it with a micro-USB connector for convenience. The micro-USB’s pin pitch didn’t fit the board perfectly, and the connector itself had a different footprint, so I had to use mod-wires
I also removed the mini-USB charging connector, and soldered-on a micro-USB connector (side rant: just like everyone else, I get totally frustrated pulling out ten different cables to charge ten different devices. With most manufacturers now standardizing around the micro-USB connector, things have become a bit easier, but Apple still stubbornly pushes its weird proprietary connectors, each one different from the previous).
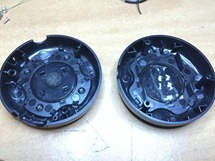
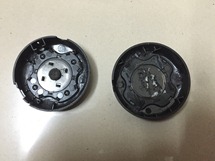
The covers, before (Left) and after (Right) modification
My idea was to use the two covers – one from each ear – to form a sort of ‘case’ for the final product. I used my Dremel to trim away the plastic standoffs for the screws on the plastic covers. I then fashioned some new screw inserts out of acrylic. The inserts were hot glued into place. Small holes were drilled into the inserts and the bottom cover to allow for the screws.

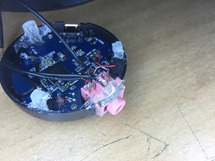
The acrylic inserts/standoffs for screws, and the 3.5mm audio connector
I had a 3.5mm audio socket (probably scavenged from an old motherboard or CD drive) in my junk box, which I also hot glued in place. Wires were then used to connect the audio outputs from the board to the socket. I took care to connect the left and right channels to the correct legs on the socket. The negative output of each differential pair was soldered to the ground pin of the socket.
Connecting the wrong output to ground would result in an out-of-phase output from the speakers. While this may not be such a big deal with headphones, it would result in sound ‘cancelling’ itself out (primarily poor bass response) if I used the BT adapter with speakers. The AudioCheck website has cool online audio files that help you determine if your speakers are connected correctly.
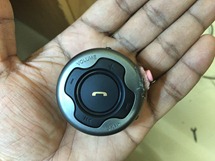
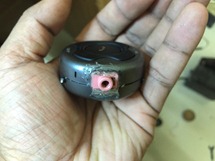
The finished project – screws on the sides, and the PINK (!!) audio socket sticking out – not the prettiest
A small slot had to be cut in the bottom cover to accommodate the audio jack. The covers are held together by three screws. The final device is not the prettiest, but it’s functional and works really well.
