Wednesday, July 11, 2012

I Got Spinners Dawg!

I am an engineer. By profession, by hobby and therefore, by passion. And being an engineer requires me to browse through PDFs several pages long, or plow through code confusing enough to make your eyes pop out. I may do this just to look cool, but all the same, I have to do it. Using a mouse scroll wheel with its annoying ‘click’ makes my index finger sore pretty quick. So then I switch to my middle finger. And pretty soon I find that I can’t give someone the bird.

Griffin
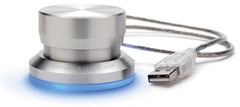
Griffin’s $40 PowerMate

Now the simple solution would be to buy myself a jog wheel / spinner. Give the jog wheel a slight twist and its momentum would keep it gliding over pages and pages of the boring PDF. But I’m an engineer. So I decided to build myself one (obviously the phrase “Why buy a cow when milk is so cheap” does not apply to engineers).

The inspiration for the build was not really ‘direct’. I never really got down to building one until I watched one of Dave’s excellent teardown videos. I was actually googling how VCR heads have a helical scan and then opened up a myriad other links, this instructable being one of them.
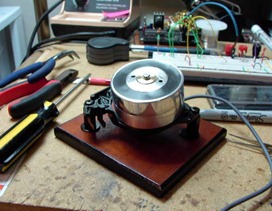
Osgeld
Osgeld has done a pretty fine job with his jog wheel

I had torn down a VCR about a year ago and mined it for parts, so I already had the basic stuff at hand. I also had an old USB mouse picked up from a dorm trash can. The tactile buttons had gone bust, but the chip itself was pretty useable.
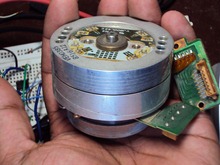
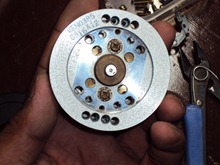
DSC02475 DSC02485
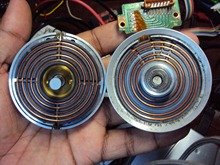
The crusty old VCR head. Oxidized and rusted

Some more googling led me to these tutorials:
http://www.instructables.com/id/Computer-scroll-wheel-bearings-version/step5/Finished-future-improvements/
http://www.instructables.com/id/Desktop-Scroll-Wheel-and-Volume-Control/

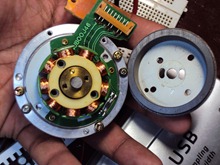
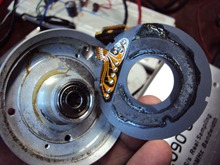
Disassembly of the head was was relatively easy. I’m just going to explain it through pictures.
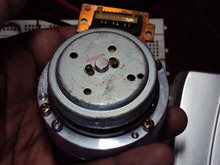
DSC02476 DSC02477
A brushless motor drives the head assembly
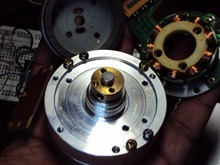
DSC02478 DSC02481
The magnetic pickups are clearly visible in the image on the right

DSC02479 DSC02480
The rotary transofrmer

[Digression - the pickups feed the signal to the coils of a rotary transformer. The transformer helps couple a signal across two rotating elements without the use of mechanical elements like slip rings. I’ve never seen a rotary transformer before, so this was the most interesting part of the teardown. The transformer ‘core’ was glued down. A blast of hot air from my heat gun helped dislodge it.]

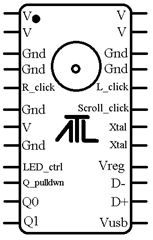
My mouse chip was an all-in-one solution with the USB comms, the optical sensor, and the click/scroll encoders integrated onto one chip. This is good since I was able to make my circuitry compact. Some mice (mouses?) distribute USB and sensor duties across two separate chips. The particular chip that I used was the A1198. Googling for the chip’s pinout or datasheet proved useless. So I used a multimeter to reverse engineer the PCB. An MSPaint pinout is below; hopefully someone else will find it useful.
Flash
Vreg gives out approx 3.3v All V should be connected to Vreg. Resistors pulldown the quadrature inputs Q0, Q1 to Q_pulldwn. If a mechanical encoder is used, then the common pin of the quadrature encoder should go to Vusb. Xtal is a 12MHz ceramic resonator.

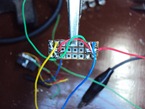
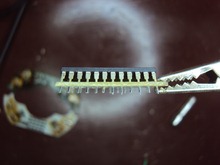
The pin spacing for the chip was a bit odd. Luckily the pins weren’t staggered like you find on some sensors. I had some 2mm pitch veroboard, which, after wiggling the pins a tad, worked just fine. I used the ceramic oscillator from the original mouse, and sprinkled a few SMD capacitors which I had scavenged from old electronics.
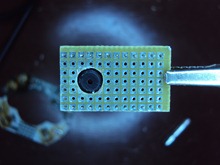
DSC02490 DSC02491
Left: IC pins splayed out
Right: I drilled a small hole for the aperture of the optical sensor to sit in

The original mouse used a mechanical quadrature encoder for the scroll wheel. I converted this into an optical encoder by using some cheap IR LEDs and phototransistors. The resistor-phototransistor-combo’s output swung from 0.1v to 3.3v. I found that I didn’t even need to use a comparator on the sensor output since the signal was fairly ‘clean’. The encoder wheel was designed and printed using shimniok’s Wheel Encoder Generator.
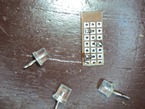
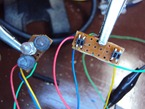
DSC02494 DSC02514 DSC02516
Left: The first sensor board I made used one IR LED and two phototransistors ground flat. This didn’t work well at all – very poor resolving power.
Centre: On the second board I used
SG-105 photoreflective sensors. They’re tiny and low profile compared to my earlier sensors.
Right: The back of the SG-105 board. SMD resistors used to bias the opto-elements; 220ohm on the LEDs, 470kohm from the phototransistor collector to
Vusb.

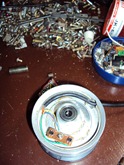
For the base I used a Canon lens holder given to me by a photographer friend. A little bit of drilling here and there made it an excellent base.
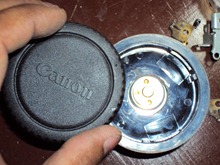
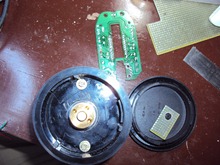
DSC02487 DSC02492
A Cannon lens cover was used as the base.
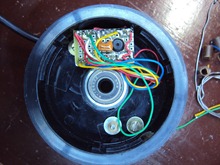
DSC02519 DSC02517
Left: The completely soldered ‘mouse’ board was stuck with some double sided foam tape in the Canon lens holder.
Right: The sensor board was fixed using a screw and a spacer. The USB cable was secured with a dot of hot glue.
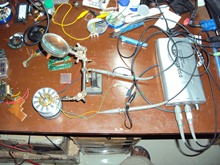
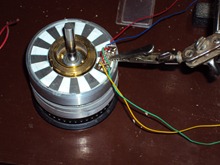
DSC02509 DSC02511Scroller
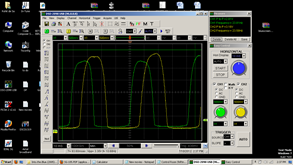
Testing the sensors with the help of my third hand and a DSO. The signal is typical of a quadrature encoder and is quite clean, as you can see in the trace.

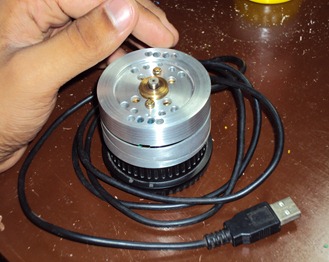
Overall I’m really happy with the way this jog/spinner wheel has turned out. No more sore fingers, and zipping over pages in a PDF, or lines of code, or through frames of a movie has become easy and super fun! Infact I’ve used it extensively while editing this very document :-) One possible addition at a later date would be to add a push button at the bottom of the shaft so that the whole spinner can be ‘pushed-to-click’.

DSC02520

Edit: I’ve uploaded a video to Youtube
Jog Wheel

Tuesday, July 3, 2012

USB OTG on a Sony Live With Walkman

I have a nice Android phone – the Sony Live With Walkman, affectionately called the ‘LWW’. The phone specs state that it has USB OTG – USB On-the-Go. OTG is a funky specification that allows phones (and other devices) to act both as a slave (so you can connect it to your computer an use it as external storage) or as a host. The host mode potentially enables you to use mice, keyboards, USB flash disks, and a whole host of other cool USB peripherals.

Now some phones have hardware that supports OTG, but it is not enabled in software. Presumably, this was because support for this was not widespread at the time of manufacture and the phone company didn’t want to go through the extra headache. Who knows! Anyway, other phones, like the LWW, support OTG natively, and you can simply plug in a mouse or a keyboard and use it with your phone. Of course you need an appropriate cable – apparently the Nokia CA-157 works fine (though I haven’t actually tested it).

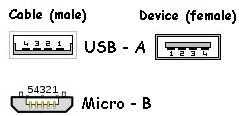
Where I currently live, a USB OTG cable is not easily available, however, it isn’t really all that difficult to build your own. All that is needed is a USB Micro-B male (the same kind that your phone charger has) and a USB A-type female. Connect the four USB wires (Vcc, Gnd, D+, D-) between the connectors. You’ll notice that the Micro-B has got 5 contacts; one of these contacts is the ‘ID’ pin. If this pin is left unconnected (as is the case in a regular USB cable) the phone stays in slave mode. If, however, the ID pin is connected to Ground, the phone switches to host mode.

 Pics
1:Vcc (5v)  2:D-  3:D+  4:Gnd (on type A), ID (on Micro B)  5:Gnd (on Micro B)

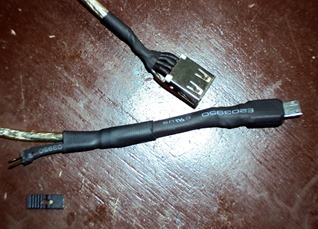
In the cable I made for myself I brought out the ID pin and the ground pin to a berg header. Now, if I want the device in host mode I jumper the header. If I want to use the cable as a regular USB cable, I simply disconnect the jumper (naturally, I’ll need a male-to-male USB cable for this).

DSC02506
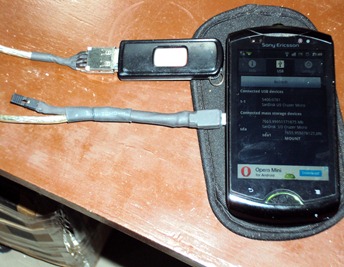
My OTG cable. I bought a Nokia CA101D and cut the end off it.
Yeah, I’ve still got to encapsulate it properly.

Once my cable was ready I just plugged in a mouse and a keyboard using a USB hub. Both devices were detected immediately and I had absolutely no problems with them. USB flash drives were another story. Getting them to work was a total PITA, but then that was the point of this whole exercise :-P The process far from painless and the reason I’m documenting it is twofold – one: so that others may read this post and find it helpful; and two: a log, just in case I have to go through this again and I forget how I did this in the first place.

1. The first step is obviously to have a working USB OTG cable. Test it out with a mouse. If it works you’re good to go.

2. The next step is to root your phone. I followed the exact instructions noted in the first post of this thread. This is a nice method since you don’t have to unlock the bootloader (unlocking leads to a whole host of other problems – DRM keys get wiped, etc). Rooting itself was relatively painless; what took time was getting the damn ‘Windoze’ drivers to work. If you have Android’s PC Companion installed, then all the necessary drivers should have been installed by default. However the ADB (Android Debug Bridge) drivers did not install on my PC and I spent the better part of the morning trying to get it to work. I finally had to manually point Windows to the file (sa0102adb.inf) and force the install.

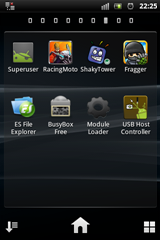
3. To check if the phone is truly rooted, scroll though the installed apps and search for the ‘Superuser’ icon. If you find this icon, it means you’re doing fine.

SUA rooted phone. See the first icon?

4. Install busybox.

5. Now download the USB Host Controller app (v0.44 at the time of writing this) from the Android market. Once installed, run it. The app will ask for superuser access. Once you grant it you’ll be presented with a wait screen (this took about 1 minute of waiting on my phone).

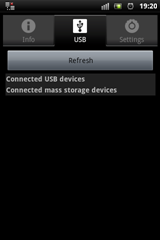
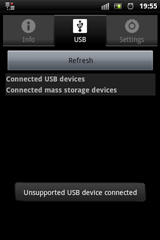
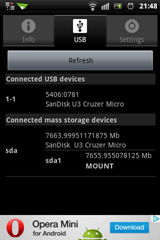
6. Connect your flash drive through the OTG cable. Ignore any ‘Unsupported device connected’ message. Click on the ‘USB’  tab. The flash drive should show up in the listing under ‘Connected Mass storage Devices’. Click on ‘mount’. I mount it to ‘/sdcard/ehdd’ so that AirDroid (which is a non-root file explorer) can read the files. However, if you use ES File Explorer or any other root browser you can mount the flash drive to a partition of your choice.

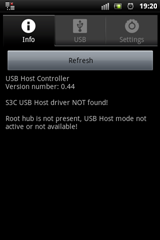
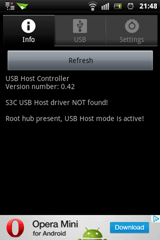
No cable connected           Cable connected
A: No OTG cable connected                       B: OTG Cable connected

Nothing connected           Unsupported Device
C: No USB devices connected                       D: The ‘error’ message

Note 1: I also tried using this method, which is actually a bit convoluted. The kernel Module Loader loaded usb-storage.ko fine, and Q5 USB Memory Manager would appear to mount my flash disk, but for some reason I couldn’t see the mounted folder using even a root explorer.

Note 2: when I first used this app it took a while to load the menu screen, but after that I was able to mount my drive properly. At the time of installing, I was also checking out other OTG mounting apps – Q5+Module Loader+usb-storage.ko . When I found that UHC worked fine, I uninstalled the other apps. Subsequently UHC would only show me that a USB device was present, but would not show the mounting option. I tried using UHC v0.42 as well. No go. Installing Module Loader and reloading usb-storage.ko was the fix. Q5 isn’t required.

Mount
This screen shows detected USB devices.
The lower half shows which of those are mass storage type.

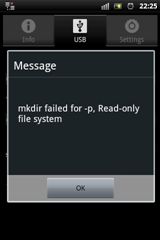
Note 3: the first time I tried mounting the flash drive I got a “mkdir failed for –p” error. A simple workaround to this it to create the folder ‘ehdd’ yourself using a PC. Just plug your phone into the PC (using a regular cable) and make a new folder on the SD Card. After this I had no problems.

Read Only
Another ‘error’. My card as well as the folder are write enabled

Anyway, now I can watch movies off flash drives, copy data from a friend’s HDD all on the move! Word of caution – don’t run very power hungry devices directly off the phone. You won’t damage it, but it’ll get hot real quick and the battery will run out of juice superfast.

DSC02505
Mounting a flash disk

The tools used are pretty generic (if I can use that term) and support a large number of devices. I don’t know why but OTG functionality is still relatively uncommon. I would think that phone manufacturers would have advertised the heck out of it. Or maybe they’re waiting to sell you a ‘value adding upgrade’ at some later date :-/

Visitors