I’ve been working with SMDs for quite some time now. Upto now I’ve been using a magnifying glass, a point tip, fine solder, and copious amounts of flux, but when you’ve got a bunch of chips with tiny little pins (or maybe even NO pins!) reflow soldering is the way to go.
Very tiny balls of solder suspended in flux form a sort of paste. This solder paste is applied to the pads over which the chip is placed. When heat is applied the solder balls melt, and helped by the flux the solder wets the pads/leads. On cooling, the solder forms a (usually) good joint.
Wanting to do a bit of reflow myself, I bought myself some solder paste (known as ‘PPD’ in Lajpat Rai Market). The paste seemed a bit dry, and in hindsight I should have added some more flux to it. But I’m getting ahead of myself. Let me tell you a bit about how I got my SMD soldered.
Normally, a stencil is used to apply the solder paste. Stencils cost a bomb to make, and spending so much just to solder a few boards is not worth it. I used Sparkfun’s tutorial as a reference, and also had a look at Fly Electric and Bill Shaw’s attempts.

The chips with flux and paste – I didn’t really care much about neatness. The surface tension of the solder ‘fixes’ itself.
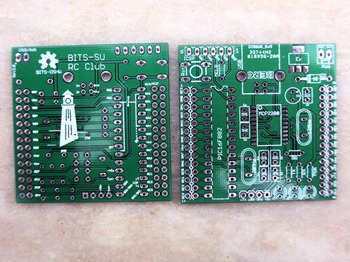
I used one of my PIC’882 dev boards with an MCP2200 20pin SOIC, and an SOT23 LM1117. The solder paste came in a small plastic container. I used a flathead screwdriver to apply the paste. I fluxed the pins of the chips, and then used a pair of tweezers to place the chips on the board.


Left: The aluminium foil on the toaster tray ensures I don’t die of lead poisoning when I toast bread later.
Right: my new multimeter has got a cool thermocouple temperature sensor
I had a regular toaster that I placed the board in. To measure temperature I used my multimeter with a thermocouple. I wasn’t to particular about time and temperature (though I suppose I should have been!). Ramp-up to 210°C took about 3 minutes.
Not wanting the temperature to go over 220°C, I turned off toaster switch when the temperature reached 218°C. The temperature went to 220°C, dragged by the thermal inertia, and then started to drop. Once the solder melted - I relied on simple visual inspection to check when the solder melted - I turned the switch on and off a couple of times over the next two minutes to keep the holding temperature roughly constant.


Making sure the temperature doesn’t exceed 220°C
After it seemed like the the solder had properly reflowed, I opened the toaster door to let the board cool in still air. Once the temperature reduced to 80°C, I picked the board off the toaster tray.

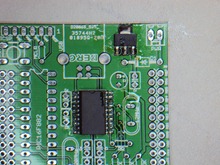
Left: Maybe I shook the board
Right: there’s nothing that a little rework can’t fix.
The alignment of the LM1117 was a bit messed up – I don’t really know how that happened. One the MCP2200 there was one solder bridge, but all the other pins seemed adequately reflowed. I think the dryish solder paste combined with the uneven application and this being my first attempt necessitated a bit a touching up on the MCP2200.
Guess I’ll have to reflow a few more boards to get perfect!

